Pages

When you make a conscious choice to be happy, no one can take it away from you because no one gave it to you: you gave it to yourself.

A quote from April Green's - Bloom For Yourself Journal

Wednesday 31 July 2013

WOYWW 217

Isn't it just fab that for the past I don't know how many Wednesdays we've been commenting on the warm weather?! I've actually worn a skirt (not the same one obviously) for nearly 3 weeks. I mean. What is going on?! The sunshine makes me smile though, but the heat and humidity......well........melts me!

Right shut up Zoe I hear you say we want to see you desk - 


Yep fan still going strong!


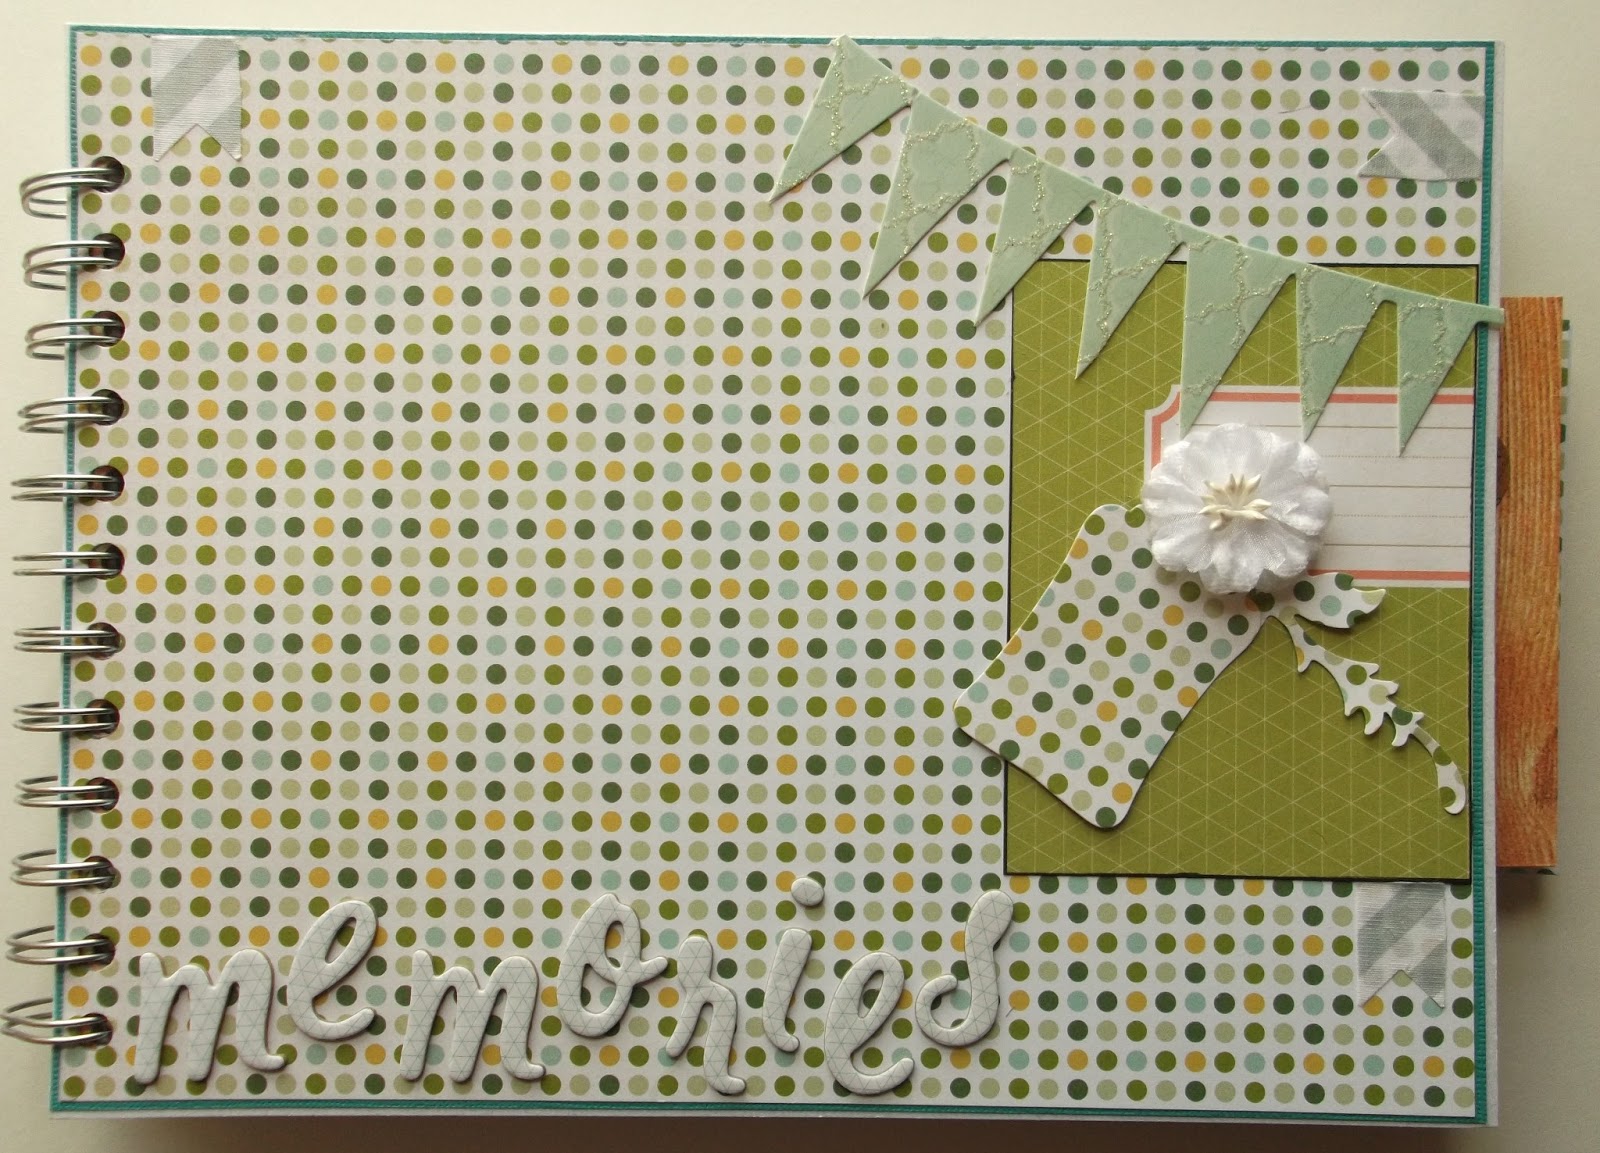
The tools always on my desk plus that black thing next to fan is another bag album I'm making. Since making my 1st one I have a few ideas so starting to put it into reality.


Eeeeek very excited Zoe here - yep that's a whole Project Life bundle. I couldn't resist getting the Midnight version. I'm not going to do a week by week thing as some do more a page layout for different memories and moments type thing.


Window Sill full of Some Odd Girl images.

Right that's me, being all brief today. Hoping to visit a few more of you than I have of late. Thank you for all of your visits though, they really do perk me up when I'm feeling rubbish. Right dash over to Julia's - The Stamping Ground and join in, dash out and get nosing!!
Take care Zo xx

Wednesday 24 July 2013

WOYWW 216?

I'm guessing it's 216 as last time it was 215!

Hello desk hoppers - hope you've popped over to The Stamping Ground, home to Queen Julia she who officiates all things desk/space to join in and to start hopping desk to desk around the world.

My desk is mid projects - anniversary cards for friends - so lots of colours and use of my new Anna Griffin rose embossing folder. Going to use one design, different colours based on the couple's favourites and go from there!


Right side with radio, fan and a pile of SU inks.

Window side - still hot and sunny here. We did have one small storm that lasted 2 mins but it did little to lift the hot sticky heat. 

Chose these colours for my designs.

Look tidy-Zoe - an empty bin!

So there you go, I will be back over the next few days to visit as many as I can.
Take care Zo xx

Monday 22 July 2013

Animals

Good afternoon - I'm a little late posting my Crafty Boots project due to me visiting my friend's little girl who is 3 today. I told her due to my red hair, funny legs (Auntie Zoe has funny legs you see cos I can't always walk properly) and bubbly fun-ness I was being Ariel (Little Mermaid) Disney style just for her! I also coloured a mermaid and made her look like Ariel - though  I'm not sure that I look like Ariel really, but little one liked the idea anyway!!

Right so the theme over at Crafty Boots challenge blog is 

ANIMALS

Chosen by the lovely Bev. So let's see your interpretation, longs it involves animals somehow you are more than welcome to pop over link up and join in!

My card is a CD crafting project, not something I've done for ages but it has the most gorgeous animals I'm sure you will recognise if you have been watching crafty TV lately!


Everything is printed from the CD other than the sentiment, card candi and Epiphany epoxy.


I printed everything on to watercolour card - this gives a lovely effect and makes some images look like watercolour.  I also printed the small image to put in my scallop circle Epiphany tool (green round things seen on my desk often!) and also I punched the pennant from my other Epiphany tool.


I love these images and accents they look so pretty and textured.

CD's are a great way to access many crafting resources, save on storage and I highly recommend buying the best papers you can because the images do look better on the better papers no matter what printer you use. I say it's the paper not the printer that dictates how it turns out. I've got a £40 Canon printer, but it takes the thick watercolour card and other 300/350gsm card no worries. 

Take care Zo xx

Friday 19 July 2013

Quirky Christmas in July

Yep you read it right, I've been making some Christmas cards.

I was awake the other night, too hot like most, and suddenly I thought of an idea. So I got out of bed came into my craft room and put the stamps out to remind me in the morning.

Next day I set to work using Tim Holtz clock stamp from Vintage Things Blueprint set and Snowflakes by Sheena Douglas. I used my new Stampin'Up inks & coordinating card - Raspberry Ripple, Island Indigo, Gumball Green & Midnight Muse - plus a sentiment from my stash.


Quirky & different I reckon!

I used 1st, 2nd & 3rd generation ink to create the backgrounds and added Card Candi. 

I wouldn't normally think to use an alarm clock, but it made me giggle and I love how the sentiment brings it together - clock for time & snowflakes for Christmas - I've only done four so far, however I do love them so may have to make this design in lots of colours.

Love to know what you think?
Take care Zo xx

Wednesday 17 July 2013

WOYWW 215

Hello desk hoppers and fellow crafting friends.

Am here as always on a Wednesday to share my crafty space with you. Please pop over the Julia's Stamping Ground to see what this is all about and, of course, join in if you wish.

Here's the photos you want to see - 

Right side - fan is a permanent fixture these days!

Window side - have to keep the blind down for a while as it gets too hot in here otherwise.

Yes you are seeing right - Christmas Humphrey images. I had a few ideas at 3 O'clock this morning so wanted to actually put them into reality. 

A rather rammed bookcase.

Oh look there's Baxter having his breakfast!

Behind the door is becoming a bit full too.

So after taking these photo's I've decided that once things cool down weather wise I shall be having a sort out again and sorting my storage. But not now, it's hot. But I'm loving waking up and seeing the sun shining. Just wish my body could cope with the heat and pain at the same time!! 

Take care Zo xx

Monday 15 July 2013

Little catch up, Ebosser thoughts & Baxter!

Time really flies, it seems lately my posts happen on Wednesdays for WOYWW with little else so I thought okay let's do a catch up!

So how are you?

Me; I'm okay-ish. Struggling to cope with heat and pain and swelling limbs. But happy to see the sun. I do enjoy sitting out and reading, but this thick muggy heat gets me. 

Baxter has been with us 12 weeks. Wow. He's settled really well and of late seems totally confident with us going out, not needing his crate and is calm. He's tolerating the Labrador's next door & no longer barks/growls at them, but likes to see where they are just to make sure they aren't going to come over!

Here he is cooling off with a cold cloth - 

And here he is sunbathing - 

I'm going to also tell you about my Ebosser. 

It's the electric die cutting machine A4 capability promoted firstly by Crafter's Companion. I bought mine from them as I'm a Platinum member and get a decent discount. My first thoughts of the machine is that it's solid, smooth working and cuts beautifully. I found you have to play with the sandwich when using different dies, but you are provided with various plates to use and to date I've not had to add any other shims other than what is provided. It is heavier than my Cuttlebug, but that's to be expected and for me it means I had to rearrange my desk so that it can be out ready as it's a bit heavy for me to move about.  It does need space to allow the plates to pass through the machine from front to back. Obviously with the bigger plates it needs that space, but for me it's a plus. It's fab to be able to cut a number of dies in one go.  Now I've got my machine and it's easier for me to use - no more turning handles - I decided to sort my dies. Some of you may have seen them in my last WOYWW post but if not - 


I've stuck my magnetic sheets to the back of the door! Now all my dies are on show and easy to get to. 

Right time for tea, but before I go, here's another Baxter photo - he loves lying on my craft room floor!


He looks young here, but he will actually be 8 yrs old in August. But he still thinks he's 2!!
Take care Zo xx


Wednesday 10 July 2013

WOYWW 214

Hello my fellow desk hoppers. I welcome you here, the kettle is always on and I have a chair ready for you to sit and have a chat if you wish!

A few things to show today and I've taken the photos while sat in my chair. One obvious addition to the right side desk, my fan, much needed, but other than that things are the same. Though there is an addition to the wall. My schedule for my Rovers articles is now up on the wall next to my Spectrum Noir certificate.


Looking out over the window side - lots of pens there and you get to see the bookcase that's next to me. That's why my desk is tidy, it's all rammed on the bookcase!


Close up of desk.


Baxter enjoying the cool air and cool floor!


Now a new addition. I was fed up with my dies being in a folder. Okay they were on magnetic sheets, but I found it a real pain getting them in and out so I came up with an idea. It didn't work to start, I didn't use strong enough adhesive, but I got there and now I have perfectly easy access to my dies. Fantastic considering I can now use them with ease with my Ebosser!!.


Yep I stuck the magnetic sheets to the back of the door. I've room for new dies now!!!

That's it from me, I thank you all for comments left before and new. They really help me and give me a much needed boost when I'm not so good. Will visit as many as I can as always.

Don't forget to pop over to Queen of all things desk/space-like, Julia's to join in.

Take care Zo xx

Friday 5 July 2013

Making my first bag album!

What a beautiful day! I've got the radio on and am listening to the tennis. 

Today I want to share lots of photos of how I made my 1st album. I watched many videos and looked at lots but then kind of went with my own ideas once I knew how. So I started with 6 paper bags, the nice strong white ones that originally had handles. I stuck 2 together by attaching the bottoms of the bags with strong glue. Doing this made me three sections. Easier to see so here's the pics - 


The bottoms are folded flat and stuck together so you have four sides, a main spine and then another flap between the bags.


Once dry I started to decorate the 'pages' which are both sides of each bag. I like the idea of keeping the bag unstuck so that things can be stored/kept in there.

The beauty of using 12 x 12 papers is that you have enough to decorate the whole album. I used a set of 16 double sided papers from the 'Take a note' Studio Calico range. Fab papers that are fairly neutral so the album can be used for most things.

I wanted to add tags to the inner spines that are between the bags so I covered them and then stuck them in too.


I stuck 2 tags back to back sandwiching the spine between them.

Once all dry I used my Cinch machine to bind them all together including 2 pieces of Centura card as a front and back covers. Both decorated with papers from the set. So now it looks like this - 


I then started to decorate the album, I will share a few pics of this but no more as I've decided to give this as a gift so won't share the totally finished album until the recipient has received it!


I added Thickers 'Memories' & a few die cuts to the front.


Excuse my fingers but this shows how much space there is in the bag for keepsakes. When I bound it I allowed extra space for this.


I added a few die cut mats throughout too. I will be adding other things to this album but want to keep that secret for now!

So there you go, my first album, I really enjoyed making it and can see me collecting bags and making many more. I will add extra pockets and envelopes the more confident I get. I will definitely make a Christmas one this year!! 

Let me know what you think!!
Take care Zo xx